How to transfer clients
The admin client management feature lets you transfer clients between yourself and a sub-user, or from one sub-user to another. This could be useful when you or a sub-user is out sick, on maternity leave, or otherwise not available.
Note: The admin client management feature is only available to account administrators (i.e., those clinicians who have the ability to create sub-user accounts).
To transfer clients
- Click My Clients on the left menu.
The My Clients page appears. By default, it displays a table of your own clients.
(Note: If you want to transfer your own clients to a sub-user, skip ahead to step 4.)
- Click the View Clients by Clinician drop-down menu at the top left of the page. The menu opens to display the names of your active sub-users.
- Select the sub-user you want to transfer clients from.
The table changes to show that sub-user’s clients.
- Select the clients you want to transfer by clicking their respective checkbox.
- Select Manage Clients’ Owner from the Action drop-down menu at the top right of the page.
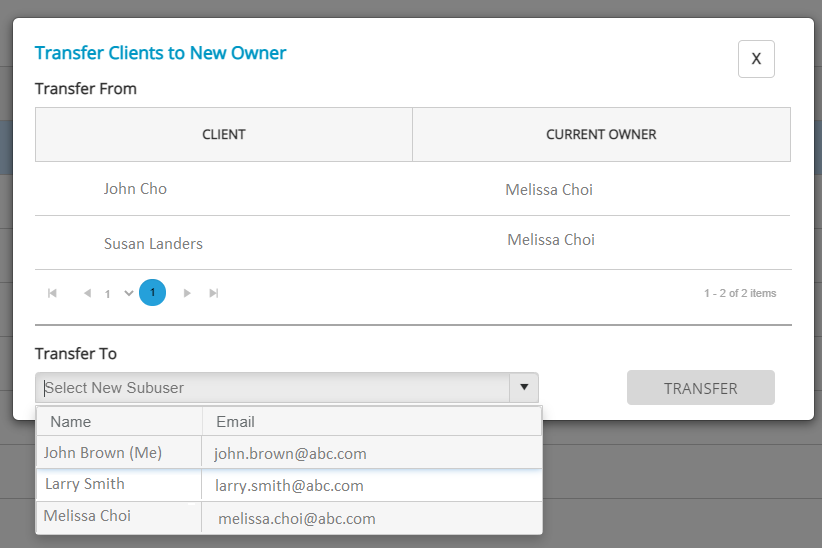
The Transfer Clients pop-up appears. It displays a list of the clients you selected for transfer, along with the name of their current owner.
- Click the Transfer To drop-down menu.
A menu opens with your name and the names of your active sub-users.

- Select the clinician to transfer the clients to.
- Click TRANSFER.
A pop-up appears asking for confirmation of the transfer.
- Click CONFIRM.
The clients are successfully transferred to the selected clinician.
The moment the clients are transferred, it will trigger the portal to send a receipt to the former client owner, the new client owner, and the administrator. This receipt will confirm what was done and the clients that were transferred.
For the clinician that the clients were transferred to, the clients will appear on their My Clients page, and all the completed assessments and reports will become available on their Completed Assessments page.
 NZ
NZ


